<?xml version="1.0" encoding="utf-8"?><feed xmlns="http://www.w3.org/2005/Atom" ><generator uri="https://jekyllrb.com/" version="3.10.0">Jekyll</generator><link href="https://techsnazzy.github.io/sean-blog/feed.xml" rel="self" type="application/atom+xml" /><link href="https://techsnazzy.github.io/sean-blog/" rel="alternate" type="text/html" /><updated>2026-08-14T02:35:03+00:00</updated><id>https://techsnazzy.github.io/sean-blog/feed.xml</id><title type="html">Sean’s Blog</title><subtitle>I&apos;m Sean. I specialize in Windows, macOS, Linux, networking, cloud, mobile, security and more. This is my blog to share my experiences. Enjoy!</subtitle><entry><title type="html">Rebranding From TechSnazzy to SeanTechGuy</title><link href="https://techsnazzy.github.io/sean-blog/blog/technology/website/2026/08/13/rebranding-from-techsnazzy-to-seantechguy.html" rel="alternate" type="text/html" title="Rebranding From TechSnazzy to SeanTechGuy" /><published>2026-08-13T17:00:00+00:00</published><updated>2026-08-13T17:00:00+00:00</updated><id>https://techsnazzy.github.io/sean-blog/blog/technology/website/2026/08/13/rebranding-from-techsnazzy-to-seantechguy</id><content type="html" xml:base="https://techsnazzy.github.io/sean-blog/blog/technology/website/2026/08/13/rebranding-from-techsnazzy-to-seantechguy.html"><![CDATA[<p>TechSnazzy started years ago as a business name, something I could put on a website and use to sound a little more official while I was building things and figuring out this industry and contracting. That business is done now, and the name has kind of outlived its purpose. What’s left is just me, so I decided it was time for a website and an online identity that actually reflects that instead of a business that no longer exists.</p>

<p>That’s how SeanTechGuy came about. It’s simpler, it’s personal, and it’s a much better fit for what this site actually is at this point: a place where I write about the stuff I’m learning and working on, not a storefront.</p>

<h2 id="what-actually-had-to-change">What actually had to change</h2>

<p>Making the switch wasn’t just a matter of updating a logo or renaming a folder. The site itself has lived on GitHub Pages for a long time, with a custom domain sitting in front of it, DNS managed through Cloudflare, and the domain registered through Namecheap. All of those pieces needed to be touched in some way to move the public facing identity from techsnazzy.com over to seantechguy.com without losing anything in the process.</p>

<p>At a high level, this meant getting the new domain pointed at the same GitHub Pages hosting the old one used, updating the hosting configuration to recognize the new domain as the official one, and making sure a valid certificate was issued so the site would still load securely under the new name. None of that touches the site’s content or code, it’s purely about which address the site answers to.</p>

<p>The other half of the work was making sure the old domain didn’t just go dark. Anyone who still has techsnazzy.com bookmarked, linked, or indexed in a search engine gets automatically forwarded over to the matching page on seantechguy.com rather than hitting a dead link. That redirect setup lives entirely in DNS and routing rules, so it happens quietly in the background without anyone needing to do anything differently.</p>

<p>One thing I was careful about the whole way through: my email address tied to the old domain didn’t change and wasn’t touched at any point during this. Moving a website’s DNS around can get messy if you’re not paying attention to what else is sitting in that same DNS zone, so this was as much about knowing what not to touch as it was about making the actual changes.</p>

<h2 id="where-things-stand-now">Where things stand now</h2>

<p>seantechguy.com is live and is now the site’s real home. techsnazzy.com still works exactly the same as before, it just quietly redirects anyone who lands there over to the new domain. Nothing about the content changed, just the name on the front door, and honestly it feels like a better fit for where I’m at now than TechSnazzy ever did.</p>

<h2 id="a-quick-note-on-how-this-was-written">A quick note on how this was written</h2>

<p>Yes, I used Claude to write this post. Don’t judge me too hard for it. The idea, the outline, and every bit of the actual work described above came entirely from me, Claude just helped turn it into something readable. That’s basically how I use it these days: I do the thinking and the doing, then it takes my rough notes and turns them into a polished writeup faster and better than I’d get around to doing myself. I’m alright with that division of labor.</p>]]></content><author><name>Sean Morrison</name></author><category term="Blog" /><category term="Technology" /><category term="Website" /><summary type="html"><![CDATA[TechSnazzy started years ago as a business name, something I could put on a website and use to sound a little more official while I was building things and figuring out this industry and contracting. That business is done now, and the name has kind of outlived its purpose. What’s left is just me, so I decided it was time for a website and an online identity that actually reflects that instead of a business that no longer exists.]]></summary></entry><entry><title type="html">Moving My Desktop from ZorinOS to Fedora 44</title><link href="https://techsnazzy.github.io/sean-blog/blog/technology/linux/fedora/2026/08/05/moving-my-desktop-from-zorinos-to-fedora-44.html" rel="alternate" type="text/html" title="Moving My Desktop from ZorinOS to Fedora 44" /><published>2026-08-05T17:30:00+00:00</published><updated>2026-08-05T17:30:00+00:00</updated><id>https://techsnazzy.github.io/sean-blog/blog/technology/linux/fedora/2026/08/05/moving-my-desktop-from-zorinos-to-fedora-44</id><content type="html" xml:base="https://techsnazzy.github.io/sean-blog/blog/technology/linux/fedora/2026/08/05/moving-my-desktop-from-zorinos-to-fedora-44.html"><![CDATA[<p>I spent a weekend moving my main desktop off ZorinOS and onto Fedora 44 Workstation. This is the write-up of how that went: the backup, the install, the restore, getting NVIDIA configured, a monitor bug that had nothing to do with any of it, and finally getting my shell back to feeling like home. I’m writing this partly for myself, so future-me has a record of what was actually done and why, instead of a vague memory of “yeah I think I ran some rsync command.”</p>

<h2 id="the-machine">The machine</h2>

<p>Nothing fancy, gaming-style computer:</p>

<ul>
  <li>Fedora 44 Workstation (kernel <code class="language-plaintext highlighter-rouge">7.1.5-201.fc44.x86_64</code>)</li>
  <li>NVIDIA GeForce RTX 3060, running the proprietary driver, not nouveau</li>
  <li>GNOME on Wayland</li>
  <li>An LG 34” ultrawide monitor (3440x1440, 21:9) as the main display</li>
  <li>zsh with Oh My Zsh as the shell setup</li>
</ul>

<h2 id="why-leave-zorinos">Why leave ZorinOS</h2>

<p>ZorinOS had been fine for a long time, but the real reason for the move is that I’ve decided to pursue Red Hat certifications to get better with enterprise Linux. I recognize Ubuntu is probably the more well known and popular distro among end users in this space, but my focus going forward is on the server side of things, not the desktop side, and that points toward Red Hat’s ecosystem instead. Fedora is the closest thing to RHEL without actually being RHEL, so reverting back to it now gets me working in that world day to day. I’ll also be spending time directly in RHEL as I go through this process. Fedora’s relationship with NVIDIA hardware isn’t perfect, but it’s well documented, and RPM Fusion makes the proprietary driver a known quantity rather than a guessing game. So the plan was: back everything up, wipe the drive, install Fedora 44 clean, then pull the important stuff back in.</p>

<h2 id="step-1-backing-up-zorinos-with-rsync">Step 1: backing up ZorinOS with rsync</h2>

<p>Before touching partitions, I backed up the ZorinOS install to an external USB drive using rsync rather than a disk image. The reasoning was simple: I didn’t need a bit-for-bit clone of a system I was about to replace, I needed the data and configuration that actually mattered, in a form I could selectively restore from later.</p>

<p>The backup covered two things specifically: <code class="language-plaintext highlighter-rouge">/etc</code> (system configuration) and my home directory, organized into its own folder on the drive rather than dumped as a raw <code class="language-plaintext highlighter-rouge">/home/sean</code>. On the USB drive those ended up as two top level folders, something like:</p>

<div class="language-plaintext highlighter-rouge"><div class="highlight"><pre class="highlight"><code>/run/media/sean/BACKUPDISK/etc
/run/media/sean/BACKUPDISK/home-organized
</code></pre></div></div>

<p>One detail worth remembering here, because it trips people up: on Fedora (and most modern distros), removable drives mount under <code class="language-plaintext highlighter-rouge">/run/media/&lt;username&gt;/&lt;label&gt;</code>, not <code class="language-plaintext highlighter-rouge">/run/media/&lt;label&gt;</code>. The username is always in the path. I’ve lost a few minutes to this exact mistake more than once.</p>

<p>The actual copy used rsync with archive mode plus flags to preserve hard links, ACLs, and extended attributes, since this was a full system backup and I wanted permissions and ownership to survive the trip:</p>

<div class="language-bash highlighter-rouge"><div class="highlight"><pre class="highlight"><code><span class="nb">sudo </span>rsync <span class="nt">-aHAX</span> <span class="nt">--info</span><span class="o">=</span>progress2 /etc /run/media/sean/BACKUPDISK/
<span class="nb">sudo </span>rsync <span class="nt">-aHAX</span> <span class="nt">--info</span><span class="o">=</span>progress2 /home/sean/ /run/media/sean/BACKUPDISK/home-organized/
</code></pre></div></div>

<p><code class="language-plaintext highlighter-rouge">-a</code> is archive mode (recursive, preserves permissions, timestamps, symlinks). <code class="language-plaintext highlighter-rouge">-H</code> preserves hard links. <code class="language-plaintext highlighter-rouge">-A</code> preserves ACLs. <code class="language-plaintext highlighter-rouge">-X</code> preserves extended attributes, which on a SELinux system includes the <code class="language-plaintext highlighter-rouge">security.selinux</code> context on every file. That last flag turned out to matter a lot later, but not during the backup itself, only when I tried to restore.</p>

<h2 id="step-2-installing-fedora-44-workstation">Step 2: installing Fedora 44 Workstation</h2>

<p>The install itself was the boring part, which is exactly what you want from an OS installer. Standard Fedora 44 Workstation image, wiped the target drive, default partitioning, GNOME desktop, done. No dual boot, no manual partition surgery, no drama. The interesting work started after first boot.</p>

<h2 id="step-3-restoring-files-with-rsync">Step 3: restoring files with rsync</h2>

<p>With Fedora up and running, I plugged the USB drive back in and started pulling files back off it, one folder at a time rather than all at once, so I could actually watch what was happening instead of trusting a single giant transfer.</p>

<p>First attempt, copying <code class="language-plaintext highlighter-rouge">etc</code> back over, used the same flags as the original backup:</p>

<div class="language-bash highlighter-rouge"><div class="highlight"><pre class="highlight"><code><span class="nb">sudo </span>rsync <span class="nt">-aHAX</span> <span class="nt">--info</span><span class="o">=</span>progress2 /run/media/sean/BACKUPDISK/etc /home/sean/Downloads/
</code></pre></div></div>

<p>This failed partway through with:</p>

<div class="language-plaintext highlighter-rouge"><div class="highlight"><pre class="highlight"><code>rsync error: some files/attrs were not transferred (see previous errors) (code 23) at main.c(1356) [sender=3.4.4]
</code></pre></div></div>

<p>Code 23 from rsync is intentionally vague, it just means “something didn’t transfer, check the log,” so I reran it with plain verbose output redirected to a file instead of the live progress bar (<code class="language-plaintext highlighter-rouge">--info=progress2</code> constantly rewrites one line, which turns into garbage once you redirect it to a file):</p>

<div class="language-bash highlighter-rouge"><div class="highlight"><pre class="highlight"><code><span class="nb">sudo </span>rsync <span class="nt">-aHAX</span> <span class="nt">-v</span> /run/media/sean/BACKUPDISK/etc /home/sean/Downloads/ <span class="se">\</span>
  <span class="o">&gt;</span> /home/sean/Claude/rsync-etc-log.txt 2&gt;&amp;1
</code></pre></div></div>

<p>The log came out at 472KB, too big to read start to finish, so I grepped it for anything that looked like an actual failure rather than scrolling:</p>

<div class="language-bash highlighter-rouge"><div class="highlight"><pre class="highlight"><code><span class="nb">grep</span> <span class="nt">-iE</span> <span class="s2">"error|denied|failed|cannot|no such|refused|rsync:"</span> rsync-etc-log.txt <span class="se">\</span>
  | <span class="nb">sort</span> | <span class="nb">uniq</span> <span class="nt">-c</span> | <span class="nb">sort</span> <span class="nt">-rn</span> | <span class="nb">head</span> <span class="nt">-60</span>
</code></pre></div></div>

<p>Every single hit was the same line, just with a different filename:</p>

<div class="language-plaintext highlighter-rouge"><div class="highlight"><pre class="highlight"><code>rsync: [receiver] rsync_xal_set: lremovexattr("/home/sean/Downloads/etc/...","security.selinux") failed: Permission denied (13)
</code></pre></div></div>

<p>That’s the <code class="language-plaintext highlighter-rouge">-X</code> flag again. It tries to preserve the <code class="language-plaintext highlighter-rouge">security.selinux</code> extended attribute on every file, and SELinux blocks writes to that specific xattr unless the process holds a MAC-admin privilege that plain <code class="language-plaintext highlighter-rouge">sudo</code> doesn’t grant. This isn’t a bug in these specific folders, it will happen on any full-tree rsync with <code class="language-plaintext highlighter-rouge">-X</code> under enforcing SELinux on Fedora. Root doesn’t automatically mean “can set arbitrary SELinux contexts.”</p>

<p>The fix was to just drop <code class="language-plaintext highlighter-rouge">-X</code> for this copy. I wasn’t restoring these files into their original system locations where matching SELinux contexts would matter, I was pulling them into <code class="language-plaintext highlighter-rouge">~/Downloads</code> for reference, where they’d get Fedora’s normal default context regardless:</p>

<div class="language-bash highlighter-rouge"><div class="highlight"><pre class="highlight"><code><span class="c"># etc</span>
<span class="nb">sudo </span>rsync <span class="nt">-aH</span> <span class="nt">-v</span> /run/media/sean/BACKUPDISK/etc /home/sean/Downloads/ <span class="se">\</span>
  <span class="o">&gt;</span> /home/sean/Claude/rsync-etc-log.txt 2&gt;&amp;1

<span class="c"># home-organized</span>
<span class="nb">sudo </span>rsync <span class="nt">-aH</span> <span class="nt">--info</span><span class="o">=</span>progress2 /run/media/sean/BACKUPDISK/home-organized /home/sean/Downloads/
</code></pre></div></div>

<p><code class="language-plaintext highlighter-rouge">-aH</code> still keeps permissions, ownership, timestamps, symlinks, and hard links, it just stops fighting SELinux over extended attributes. Both copies finished cleanly after that.</p>

<p>One side effect of running the copy under <code class="language-plaintext highlighter-rouge">sudo</code>: everything under <code class="language-plaintext highlighter-rouge">~/Downloads/etc</code> ended up owned by <code class="language-plaintext highlighter-rouge">root:root</code>. Nautilus shows a little padlock icon on folders like that, which looks alarming but just means my regular account has read and execute access without write access, not that anything’s broken. Fixed with a straightforward chown once the copy was done:</p>

<div class="language-bash highlighter-rouge"><div class="highlight"><pre class="highlight"><code><span class="nb">sudo chown</span> <span class="nt">-R</span> sean:sean /home/sean/Downloads/etc
<span class="nb">sudo chown</span> <span class="nt">-R</span> sean:sean /home/sean/Downloads/home-organized
</code></pre></div></div>

<p>From there I went through <code class="language-plaintext highlighter-rouge">home-organized</code> by hand and moved the pieces I actually wanted (dotfiles, project folders, SSH keys, that kind of thing) back into their real locations in <code class="language-plaintext highlighter-rouge">/home/sean</code>, rather than restoring the whole tree wholesale. Old home directories accumulate a lot of things you don’t actually want to carry forward, and a fresh install is a good excuse to leave the rest behind.</p>

<h2 id="step-4-getting-the-nvidia-driver-working">Step 4: getting the NVIDIA driver working</h2>

<p>Fedora ships with the open source nouveau driver by default, and nouveau will get a desktop on screen, but it won’t give you CUDA or full hardware accelerated OpenGL on an RTX card. Getting the proprietary driver installed and confirmed working went smoothly, though it helps to understand what “installed” versus “actually active” means on Fedora.</p>

<p>First, RPM Fusion’s nonfree repo needs to be enabled, since that’s what provides <code class="language-plaintext highlighter-rouge">akmod-nvidia</code>. With that in place:</p>

<div class="language-bash highlighter-rouge"><div class="highlight"><pre class="highlight"><code><span class="nb">sudo </span>dnf <span class="nb">install</span> <span class="nt">-y</span> akmod-nvidia xorg-x11-drv-nvidia-cuda
</code></pre></div></div>

<p><code class="language-plaintext highlighter-rouge">akmod-nvidia</code> doesn’t ship a prebuilt kernel module, it builds one against whatever kernel you’re currently running, in the background, via the <code class="language-plaintext highlighter-rouge">akmods</code> service. That build can take a few minutes, and if you reboot before it finishes, you’re back on nouveau with no explanation why. So the thing to check before rebooting is whether the module actually built for your running kernel:</p>

<div class="language-bash highlighter-rouge"><div class="highlight"><pre class="highlight"><code>rpm <span class="nt">-qa</span> | <span class="nb">grep </span>nvidia
modinfo nvidia
</code></pre></div></div>

<p><code class="language-plaintext highlighter-rouge">modinfo nvidia</code> should point at a <code class="language-plaintext highlighter-rouge">.ko</code> or <code class="language-plaintext highlighter-rouge">.ko.xz</code> file living under <code class="language-plaintext highlighter-rouge">/lib/modules/$(uname -r)/</code>. If <code class="language-plaintext highlighter-rouge">kmod-nvidia-$(uname -r)-...</code> isn’t listed yet in the rpm query, the build just hasn’t finished, wait and check again rather than assuming something’s wrong.</p>

<p>The other piece that has to be in place is a nouveau blacklist on the kernel command line. The driver package’s install script usually adds this automatically to <code class="language-plaintext highlighter-rouge">/etc/default/grub</code>:</p>

<div class="language-plaintext highlighter-rouge"><div class="highlight"><pre class="highlight"><code>GRUB_CMDLINE_LINUX="... rd.driver.blacklist=nouveau,nova_core modprobe.blacklist=nouveau,nova_core"
</code></pre></div></div>

<p>but <code class="language-plaintext highlighter-rouge">/etc/default/grub</code> is only a template. What the bootloader actually reads at boot time is the BLS entry under <code class="language-plaintext highlighter-rouge">/boot/loader/entries/*.conf</code>, and editing the template alone doesn’t do anything until that’s regenerated, or until you push the args in directly with <code class="language-plaintext highlighter-rouge">grubby</code>:</p>

<div class="language-bash highlighter-rouge"><div class="highlight"><pre class="highlight"><code><span class="nb">sudo </span>grubby <span class="nt">--update-kernel</span><span class="o">=</span>ALL <span class="nt">--args</span><span class="o">=</span><span class="s2">"rd.driver.blacklist=nouveau,nova_core modprobe.blacklist=nouveau,nova_core"</span>
</code></pre></div></div>

<p>After a reboot (<code class="language-plaintext highlighter-rouge">sudo systemctl reboot</code>), I ran through a short checklist to confirm the proprietary driver was actually the one in use, not just installed alongside nouveau:</p>

<div class="language-bash highlighter-rouge"><div class="highlight"><pre class="highlight"><code><span class="nb">cat</span> /proc/cmdline                     <span class="c"># should show modprobe.blacklist=nouveau,nova_core</span>
lsmod | <span class="nb">grep</span> <span class="nt">-E</span> <span class="s2">"nvidia|nouveau"</span>      <span class="c"># nvidia present, nouveau absent</span>
nvidia-smi                            <span class="c"># should report the GPU</span>
lspci <span class="nt">-k</span> | <span class="nb">grep</span> <span class="nt">-A3</span> VGA               <span class="c"># "Kernel driver in use: nvidia"</span>
glxinfo | <span class="nb">grep</span> <span class="s2">"OpenGL renderer"</span>      <span class="c"># NVIDIA renderer, not Mesa/zink/NVK</span>
</code></pre></div></div>

<p>All of that came back clean:</p>

<div class="language-plaintext highlighter-rouge"><div class="highlight"><pre class="highlight"><code>$ nvidia-smi --query-gpu=driver_version,name --format=csv
driver_version, name
610.43.03, NVIDIA GeForce RTX 3060
</code></pre></div></div>

<p>Worth noting: dracut is set up (via <code class="language-plaintext highlighter-rouge">/usr/lib/dracut/dracut.conf.d/99-nvidia-dracut.conf</code>) to deliberately leave the nvidia modules out of the initramfs. That’s expected behavior, not a misconfiguration, the driver loads from userspace later in the boot process. No initramfs rebuild needed.</p>

<h2 id="step-5-an-unrelated-monitor-bug">Step 5: an unrelated monitor bug</h2>

<p>Not part of the migration exactly, but it happened in the same window of getting the machine dialed in, so it’s going in this write-up. My external LG 34” ultrawide monitor (3440x1440 native, 21:9) looked stretched no matter what resolution I picked in Settings. Turned out GNOME/Mutter was driving it at 1920x1080, a 16:9 resolution, and since the panel doesn’t letterbox a mismatched aspect ratio, it just stretched the image horizontally to fill the full 21:9 width. Any 16:9 resolution produced the same stretch, which is why it looked like nothing I picked fixed it.</p>

<p>The monitor’s EDID reports <code class="language-plaintext highlighter-rouge">4096x2160@24Hz</code> as its “preferred” mode and calls itself <code class="language-plaintext highlighter-rouge">LG SMART WQHD</code>, both of which are red herrings for what’s actually a 34” ultrawide panel. I confirmed the real state with Mutter’s D-Bus interface directly:</p>

<div class="language-bash highlighter-rouge"><div class="highlight"><pre class="highlight"><code>gdbus call <span class="nt">--session</span> <span class="nt">--dest</span> org.gnome.Mutter.DisplayConfig <span class="se">\</span>
  <span class="nt">--object-path</span> /org/gnome/Mutter/DisplayConfig <span class="se">\</span>
  <span class="nt">--method</span> org.gnome.Mutter.DisplayConfig.GetCurrentState
</code></pre></div></div>

<p>and set it to the correct native mode with 1.25x scaling (3440x1440 at 1.0x is uncomfortably small to read):</p>

<div class="language-bash highlighter-rouge"><div class="highlight"><pre class="highlight"><code>gdbus call <span class="nt">--session</span> <span class="nt">--dest</span> org.gnome.Mutter.DisplayConfig <span class="se">\</span>
  <span class="nt">--object-path</span> /org/gnome/Mutter/DisplayConfig <span class="se">\</span>
  <span class="nt">--method</span> org.gnome.Mutter.DisplayConfig.ApplyMonitorsConfig <span class="se">\</span>
  1 2 <span class="se">\</span>
  <span class="s2">"[(0, 0, 1.25, uint32 0, true, [('HDMI-2', '3440x1440@49.987', @a{sv} {})])]"</span> <span class="se">\</span>
  <span class="s2">"{}"</span>
</code></pre></div></div>

<p>The <code class="language-plaintext highlighter-rouge">2</code> at the start selects persistent mode, which writes the result to <code class="language-plaintext highlighter-rouge">~/.config/monitors.xml</code> so it survives logout and reboot rather than only applying to the live session.</p>

<h2 id="step-6-setting-up-zsh-and-oh-my-zsh">Step 6: setting up zsh and Oh My Zsh</h2>

<p>Bash is fine, but I’ve used zsh with Oh My Zsh for years and a fresh install isn’t a good enough reason to switch. Installing it was routine:</p>

<div class="language-bash highlighter-rouge"><div class="highlight"><pre class="highlight"><code><span class="nb">sudo </span>dnf <span class="nb">install</span> <span class="nt">-y</span> zsh
sh <span class="nt">-c</span> <span class="s2">"</span><span class="si">$(</span>curl <span class="nt">-fsSL</span> https://raw.githubusercontent.com/ohmyzsh/ohmyzsh/master/tools/install.sh<span class="si">)</span><span class="s2">"</span>
chsh <span class="nt">-s</span> <span class="si">$(</span>which zsh<span class="si">)</span>
</code></pre></div></div>

<p>That drops a default <code class="language-plaintext highlighter-rouge">~/.zshrc</code> and an <code class="language-plaintext highlighter-rouge">~/.oh-my-zsh</code> directory with <code class="language-plaintext highlighter-rouge">custom/plugins</code> and <code class="language-plaintext highlighter-rouge">custom/themes</code> folders for anything not bundled with the core install. From there it was a matter of rebuilding my actual config rather than living with the defaults.</p>

<h3 id="theme-and-plugins">Theme and plugins</h3>

<p>I use the built in <code class="language-plaintext highlighter-rouge">gentoo</code> theme rather than the Oh My Zsh default, and only two plugins: <code class="language-plaintext highlighter-rouge">git</code> (for branch/status info in the prompt) and <code class="language-plaintext highlighter-rouge">zsh-autosuggestions</code>, which isn’t bundled and has to be cloned in manually:</p>

<div class="language-bash highlighter-rouge"><div class="highlight"><pre class="highlight"><code>git clone https://github.com/zsh-users/zsh-autosuggestions <span class="se">\</span>
  ~/.oh-my-zsh/custom/plugins/zsh-autosuggestions
</code></pre></div></div>

<p>Once it’s sitting in <code class="language-plaintext highlighter-rouge">custom/plugins/</code>, Oh My Zsh picks it up automatically as long as it’s listed in the <code class="language-plaintext highlighter-rouge">plugins</code> array in <code class="language-plaintext highlighter-rouge">.zshrc</code>:</p>

<div class="language-bash highlighter-rouge"><div class="highlight"><pre class="highlight"><code><span class="nb">export </span><span class="nv">ZSH</span><span class="o">=</span><span class="s2">"</span><span class="nv">$HOME</span><span class="s2">/.oh-my-zsh"</span>
<span class="nv">ZSH_THEME</span><span class="o">=</span><span class="s2">"gentoo"</span>

<span class="nv">plugins</span><span class="o">=(</span>
  git
  zsh-autosuggestions
<span class="o">)</span>

<span class="nb">source</span> <span class="nv">$ZSH</span>/oh-my-zsh.sh
</code></pre></div></div>

<h3 id="a-custom-prompt-on-top-of-the-theme">A custom prompt on top of the theme</h3>

<p>The <code class="language-plaintext highlighter-rouge">gentoo</code> theme’s default prompt is fine, but I override the git prompt segment colors and the whole <code class="language-plaintext highlighter-rouge">PS1</code> to get a specific look, blues and purples for the username, host, and current directory, with git status folded in wherever there’s a repo:</p>

<div class="language-bash highlighter-rouge"><div class="highlight"><pre class="highlight"><code><span class="nv">ZSH_THEME_GIT_PROMPT_PREFIX</span><span class="o">=</span><span class="s2">"%{</span><span class="si">$(</span>tput setaf 117<span class="si">)</span><span class="s2">%}("</span>
<span class="nv">ZSH_THEME_GIT_PROMPT_SUFFIX</span><span class="o">=</span><span class="s2">"%{</span><span class="si">$(</span>tput setaf 117<span class="si">)</span><span class="s2">%}) "</span>
<span class="nv">ZSH_THEME_GIT_PROMPT_DIRTY</span><span class="o">=</span><span class="s2">"%{</span><span class="si">$(</span>tput setaf 210<span class="si">)</span><span class="s2">%}*"</span>
<span class="nv">ZSH_THEME_GIT_PROMPT_CLEAN</span><span class="o">=</span><span class="s2">""</span>

<span class="nb">export </span><span class="nv">PS1</span><span class="o">=</span><span class="s2">"%{</span><span class="si">$(</span>tput setaf 39<span class="si">)</span><span class="s2">%}%n%{</span><span class="si">$(</span>tput setaf 45<span class="si">)</span><span class="s2">%}@%{</span><span class="si">$(</span>tput setaf 51<span class="si">)</span><span class="s2">%}%m %{</span><span class="si">$(</span>tput setaf 195<span class="si">)</span><span class="s2">%}%1~ </span><span class="se">\$</span><span class="s2">(git_prompt_info)%{</span><span class="si">$(</span>tput sgr0<span class="si">)</span><span class="s2">%}</span><span class="nv">$ </span><span class="s2">"</span>
</code></pre></div></div>

<p><code class="language-plaintext highlighter-rouge">tput setaf &lt;n&gt;</code> picks a 256 color palette entry rather than hardcoding raw ANSI codes, which makes each color easy to swap without decoding escape sequences by hand. <code class="language-plaintext highlighter-rouge">git_prompt_info</code> is a function Oh My Zsh’s <code class="language-plaintext highlighter-rouge">git</code> plugin provides, and calling it inside <code class="language-plaintext highlighter-rouge">PS1</code> means the prompt only shows a git segment when the current directory is actually inside a repo.</p>

<h3 id="recoloring-the-whole-terminal-when-connecting-over-ssh">Recoloring the whole terminal when connecting over SSH</h3>

<p>This is the part of my config I like most. When I SSH into this machine from somewhere else on the network, say from another box at <code class="language-plaintext highlighter-rouge">10.0.0.x</code>, I want the terminal to visually announce “you are on a remote connection” so I don’t accidentally run something destructive on the wrong machine while on autopilot. <code class="language-plaintext highlighter-rouge">.zshrc</code> checks for <code class="language-plaintext highlighter-rouge">$SSH_CONNECTION</code>, which zsh sets automatically for any shell started over SSH, and if it’s present, repaints the entire terminal color palette to a warm red/orange scheme using OSC escape sequences:</p>

<div class="language-bash highlighter-rouge"><div class="highlight"><pre class="highlight"><code><span class="k">if</span> <span class="o">[[</span> <span class="nt">-n</span> <span class="s2">"</span><span class="nv">$SSH_CONNECTION</span><span class="s2">"</span> <span class="o">]]</span><span class="p">;</span> <span class="k">then</span>
  <span class="c"># Push hot (red/orange/yellow) colors to the remote terminal via OSC sequences</span>
  <span class="nb">printf</span> <span class="s1">'\e]11;#120800\e\\'</span>   <span class="c"># background</span>
  <span class="nb">printf</span> <span class="s1">'\e]10;#ffcc88\e\\'</span>   <span class="c"># foreground</span>
  <span class="nb">printf</span> <span class="s1">'\e]12;#ff6600\e\\'</span>   <span class="c"># cursor</span>
  <span class="nb">printf</span> <span class="s1">'\e]4;0;#1a0800\e\\'</span>  <span class="c"># black</span>
  <span class="nb">printf</span> <span class="s1">'\e]4;1;#ff3300\e\\'</span>  <span class="c"># red</span>
  <span class="nb">printf</span> <span class="s1">'\e]4;2;#ff8800\e\\'</span>  <span class="c"># green -&gt; orange</span>
  <span class="c"># ...and so on through all 16 palette slots</span>

  <span class="nv">ZSH_THEME_GIT_PROMPT_PREFIX</span><span class="o">=</span><span class="s2">"%{</span><span class="si">$(</span>tput setaf 216<span class="si">)</span><span class="s2">%}("</span>
  <span class="nv">ZSH_THEME_GIT_PROMPT_SUFFIX</span><span class="o">=</span><span class="s2">"%{</span><span class="si">$(</span>tput setaf 216<span class="si">)</span><span class="s2">%}) "</span>
  <span class="nv">ZSH_THEME_GIT_PROMPT_DIRTY</span><span class="o">=</span><span class="s2">"%{</span><span class="si">$(</span>tput setaf 196<span class="si">)</span><span class="s2">%}*"</span>
  <span class="nb">export </span><span class="nv">PS1</span><span class="o">=</span><span class="s2">"%{</span><span class="si">$(</span>tput setaf 196<span class="si">)</span><span class="s2">%}%n%{</span><span class="si">$(</span>tput setaf 202<span class="si">)</span><span class="s2">%}@%{</span><span class="si">$(</span>tput setaf 208<span class="si">)</span><span class="s2">%}%m %{</span><span class="si">$(</span>tput setaf 220<span class="si">)</span><span class="s2">%}%1~ </span><span class="se">\$</span><span class="s2">(git_prompt_info)%{</span><span class="si">$(</span>tput sgr0<span class="si">)</span><span class="s2">%}</span><span class="nv">$ </span><span class="s2">"</span>
<span class="k">fi</span>
</code></pre></div></div>

<p><code class="language-plaintext highlighter-rouge">\e]11;...\e\\</code> and <code class="language-plaintext highlighter-rouge">\e]10;...\e\\</code> are OSC 10/11, which set the terminal’s default foreground and background colors directly, and <code class="language-plaintext highlighter-rouge">\e]4;N;...\e\\</code> is OSC 4, which remaps palette slot <code class="language-plaintext highlighter-rouge">N</code> to a specific hex color. Any terminal emulator that supports these OSC sequences (most modern ones do) will pick this up the moment the shell prints it, no terminal side configuration required. The practical effect: local sessions on this desktop stay in cool blues, and the instant I’m working inside an SSH session on this box from somewhere else, everything shifts to warm orange, at a glance, no reading required.</p>

<h3 id="aliases">Aliases</h3>

<p>A handful of aliases round out the config. Nothing fancy, mostly shortcuts for things I do often enough that typing them out fully got annoying:</p>

<div class="language-bash highlighter-rouge"><div class="highlight"><pre class="highlight"><code><span class="nb">alias </span><span class="nv">ll</span><span class="o">=</span><span class="s2">"ls -lah"</span>

<span class="nb">alias </span><span class="nv">vm</span><span class="o">=</span><span class="s1">'qemu-system-x86_64 -m 1024 -cpu pentium3 -hda /home/sean/VMs/winxp/winxp.qcow2 \
  -boot c -vga std -usb -device usb-tablet -netdev user,id=n1 -device rtl8139,netdev=n1 \
  -rtc base=localtime -display gtk,zoom-to-fit=on'</span>
</code></pre></div></div>

<p><code class="language-plaintext highlighter-rouge">vm</code> boots a small Windows XP virtual machine I keep around under QEMU, useful for the odd case where something only runs on ancient Windows. The <code class="language-plaintext highlighter-rouge">-cpu pentium3</code> and low memory allocation match what XP actually expects rather than throwing modern CPU features and RAM at an OS from 2001 that doesn’t know what to do with either.</p>

<h2 id="step-7-keeping-backups-going-forward">Step 7: keeping backups going forward</h2>

<p>Now that the machine is set up the way I want, I added an alias for ongoing backups to an external drive, rather than only backing up once during the migration and never again:</p>

<div class="language-bash highlighter-rouge"><div class="highlight"><pre class="highlight"><code><span class="nb">alias </span><span class="nv">backup</span><span class="o">=</span><span class="s1">'mountpoint -q /media/sean/BACKUP &amp;&amp; \
  rsync -aHAX --delete --info=progress2 /home/sean/ /media/sean/BACKUP/ || \
  echo "backup: /media/sean/BACKUP is not mounted, plug in the BACKUP drive first" &gt;&amp;2'</span>
</code></pre></div></div>

<p><code class="language-plaintext highlighter-rouge">mountpoint -q</code> checks first whether the drive is actually plugged in and mounted before doing anything, so a stray <code class="language-plaintext highlighter-rouge">backup</code> command with no drive attached fails with a clear message instead of either erroring out confusingly or, worse, silently doing nothing. <code class="language-plaintext highlighter-rouge">--delete</code> keeps the backup a mirror of the current home directory rather than an ever growing archive of files I’ve since removed. This time I kept <code class="language-plaintext highlighter-rouge">-X</code> in the flags, since this backup does need to preserve SELinux contexts, unlike the one time copy into <code class="language-plaintext highlighter-rouge">~/Downloads</code> for reference.</p>

<h2 id="where-things-stand-now">Where things stand now</h2>

<p>The desktop is fully on Fedora 44, running the proprietary NVIDIA driver with CUDA and hardware accelerated OpenGL confirmed working, the ultrawide monitor is displaying at its correct native resolution, and the shell feels like the same one I’ve been using for years, cool blue prompt locally, warm orange the moment I’m in over SSH. The whole migration came down to three tools doing almost all the real work: rsync for moving data both directions, dnf and RPM Fusion for getting the right driver installed, and a D-Bus call to Mutter for a display bug that had nothing to do with the migration but needed fixing anyway.</p>

<p>The main lesson worth carrying forward: when an rsync copy fails partway through with a vague error code, don’t guess, redirect verbose output to a log file and grep it for the actual error lines. The real cause is usually one specific line repeated hundreds of times, not hundreds of different problems.</p>]]></content><author><name>Sean Morrison</name></author><category term="Blog" /><category term="Technology" /><category term="Linux" /><category term="Fedora" /><summary type="html"><![CDATA[I spent a weekend moving my main desktop off ZorinOS and onto Fedora 44 Workstation. This is the write-up of how that went: the backup, the install, the restore, getting NVIDIA configured, a monitor bug that had nothing to do with any of it, and finally getting my shell back to feeling like home. I’m writing this partly for myself, so future-me has a record of what was actually done and why, instead of a vague memory of “yeah I think I ran some rsync command.”]]></summary></entry><entry><title type="html">Setting Up a Free and Open Source MDM with FleetDM on Proxmox</title><link href="https://techsnazzy.github.io/sean-blog/blog/technology/linux/proxmox/2026/08/05/setting-up-fleetdm-on-proxmox.html" rel="alternate" type="text/html" title="Setting Up a Free and Open Source MDM with FleetDM on Proxmox" /><published>2026-08-05T17:00:00+00:00</published><updated>2026-08-05T17:00:00+00:00</updated><id>https://techsnazzy.github.io/sean-blog/blog/technology/linux/proxmox/2026/08/05/setting-up-fleetdm-on-proxmox</id><content type="html" xml:base="https://techsnazzy.github.io/sean-blog/blog/technology/linux/proxmox/2026/08/05/setting-up-fleetdm-on-proxmox.html"><![CDATA[<p>I’ve been wanting to get real visibility into every device on my home network for a while now. Laptops, phones, tablets, all scattered around the house with no oversight unless something breaks. One day I just decided I wanted to self host a proper MDM instead of continuing to live without one, and FleetDM was the tool I kept coming back to.</p>

<p>FleetDM is an open source device management platform. It handles endpoint visibility, osquery based reporting, and MDM style management for macOS, Windows, Linux, iOS, iPadOS, and a few other platforms. It’s exactly the kind of tool I wanted for this project, something open source that I control instead of a SaaS product I’m renting.</p>

<p>Once I decided to do it, the plan was straightforward: spin up an Ubuntu server on my Proxmox host in my homelab and self host Fleet on it. This post covers standing up Fleet itself. Enrolling all my devices, two MacBooks, some iPads, iPhones, a Windows laptop, and a handful of other things, is its own project I’ll cover separately.</p>

<h2 id="the-plan">The plan</h2>

<p>My Proxmox host is a small home server. Fleet needs Docker, and I wanted it isolated from everything else already running on that box, so the plan was to give it its own dedicated Ubuntu server VM rather than tucking it into an existing container. That VM is the only thing this post is about: getting a clean, dedicated place for Fleet to live so it can start managing the rest of my devices.</p>

<h3 id="creating-the-vm">Creating the VM</h3>

<p>Fleet’s own <a href="https://fleetdm.com/guides/deploy-fleet-on-proxmox">deployment guide</a> walks through creating a VM and running through the Ubuntu Server installer manually. Since I wanted this to be repeatable and scriptable, I used the Ubuntu 24.04 cloud image with cloud-init instead of the interactive ISO installer. Same end result, an Ubuntu 24.04 VM, just no clicking through installer screens.</p>

<p>First I grabbed the cloud image:</p>

<div class="language-bash highlighter-rouge"><div class="highlight"><pre class="highlight"><code>curl <span class="nt">-L</span> <span class="nt">-O</span> https://cloud-images.ubuntu.com/noble/current/noble-server-cloudimg-amd64.img
</code></pre></div></div>

<p>Proxmox’s ability to pull large files directly from certain CDNs has been flaky for me in the past, so I downloaded it locally and copied it over with <code class="language-plaintext highlighter-rouge">scp</code>:</p>

<div class="language-bash highlighter-rouge"><div class="highlight"><pre class="highlight"><code>scp noble-server-cloudimg-amd64.img root@10.0.0.20:/var/lib/vz/template/cache/
</code></pre></div></div>

<p>Then, on the Proxmox host itself, I created the VM and attached the cloud image as its disk:</p>

<div class="language-bash highlighter-rouge"><div class="highlight"><pre class="highlight"><code>qm create 106 <span class="nt">--name</span> fleet <span class="nt">--memory</span> 4096 <span class="nt">--cores</span> 2 <span class="nt">--cpu</span> host <span class="se">\</span>
  <span class="nt">--net0</span> virtio,bridge<span class="o">=</span>vmbr0 <span class="nt">--scsihw</span> virtio-scsi-pci <span class="nt">--ostype</span> l26 <span class="nt">--agent</span> <span class="nv">enabled</span><span class="o">=</span>1

qm importdisk 106 /var/lib/vz/template/cache/noble-server-cloudimg-amd64.img local-lvm

qm <span class="nb">set </span>106 <span class="nt">--scsi0</span> local-lvm:vm-106-disk-0
qm <span class="nb">set </span>106 <span class="nt">--ide2</span> local-lvm:cloudinit
qm <span class="nb">set </span>106 <span class="nt">--boot</span> <span class="nv">order</span><span class="o">=</span>scsi0
qm <span class="nb">set </span>106 <span class="nt">--serial0</span> socket <span class="nt">--vga</span> serial0
qm resize 106 scsi0 20G
</code></pre></div></div>

<p>The cloud image ships with a small disk, so the <code class="language-plaintext highlighter-rouge">qm resize</code> call is what actually gets me to the 20GB Fleet’s guide calls for as a minimum.</p>

<p>Next, cloud-init configuration for networking and access:</p>

<div class="language-bash highlighter-rouge"><div class="highlight"><pre class="highlight"><code>qm <span class="nb">set </span>106 <span class="nt">--ipconfig0</span> <span class="nv">ip</span><span class="o">=</span>10.0.0.90/24,gw<span class="o">=</span>10.0.0.1
qm <span class="nb">set </span>106 <span class="nt">--nameserver</span> 1.1.1.1
qm <span class="nb">set </span>106 <span class="nt">--ciuser</span> ubuntu
qm <span class="nb">set </span>106 <span class="nt">--sshkeys</span> ~/.ssh/id_ed25519.pub
</code></pre></div></div>

<p>And then start it up:</p>

<div class="language-bash highlighter-rouge"><div class="highlight"><pre class="highlight"><code>qm start 106
</code></pre></div></div>

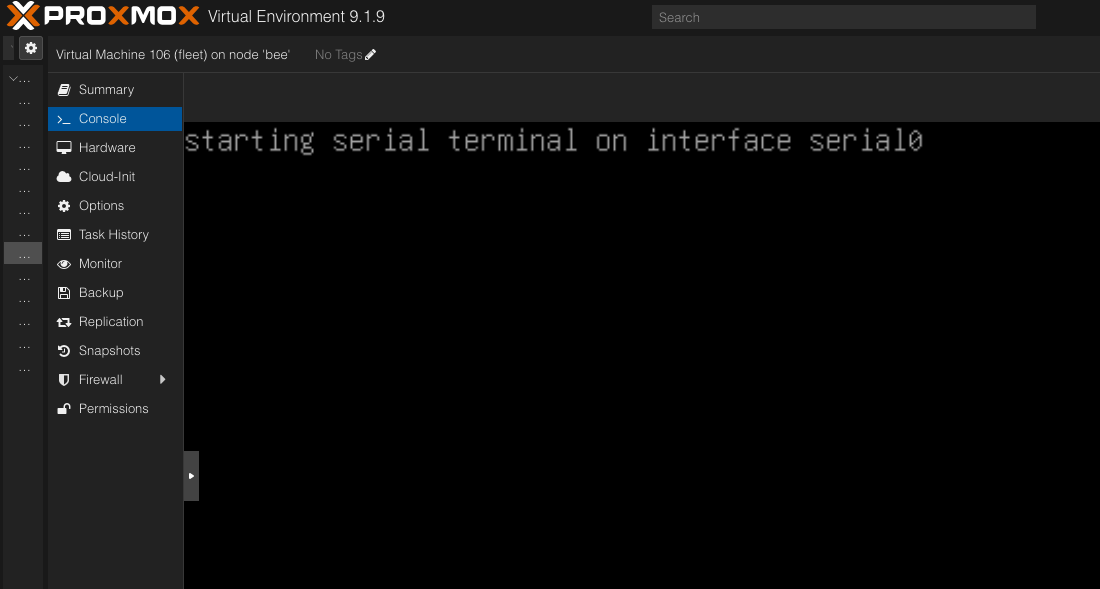
<p>A minute or two later I had a fully booted Ubuntu 24.04 VM at <code class="language-plaintext highlighter-rouge">10.0.0.90</code>, reachable over SSH with my key already in place. No installer screens, no console interaction needed.</p>

<p><img src="https://techsnazzy.github.io/sean-blog/assets/images/080526-proxmox-console.png" alt="Proxmox console showing the Fleet VM booting" /></p>

<h3 id="installing-docker">Installing Docker</h3>

<p>Fleet runs as a set of containers managed with Docker Compose, so the VM needs Docker installed. I followed Docker’s official install steps for Ubuntu rather than whatever version happens to be in Ubuntu’s default repos:</p>

<div class="language-bash highlighter-rouge"><div class="highlight"><pre class="highlight"><code><span class="nb">sudo </span>apt update
<span class="nb">sudo </span>apt <span class="nb">install</span> <span class="nt">-y</span> ca-certificates curl

<span class="nb">sudo install</span> <span class="nt">-m</span> 0755 <span class="nt">-d</span> /etc/apt/keyrings
<span class="nb">sudo </span>curl <span class="nt">-fsSL</span> https://download.docker.com/linux/ubuntu/gpg <span class="nt">-o</span> /etc/apt/keyrings/docker.asc
<span class="nb">sudo chmod </span>a+r /etc/apt/keyrings/docker.asc
</code></pre></div></div>

<p>Then add Docker’s repo to apt sources:</p>

<div class="language-bash highlighter-rouge"><div class="highlight"><pre class="highlight"><code><span class="nb">.</span> /etc/os-release
<span class="nb">sudo tee</span> /etc/apt/sources.list.d/docker.sources <span class="o">&gt;</span> /dev/null <span class="o">&lt;&lt;</span><span class="no">EOF</span><span class="sh">
Types: deb
URIs: https://download.docker.com/linux/ubuntu
Suites: </span><span class="k">${</span><span class="nv">UBUNTU_CODENAME</span><span class="k">:-</span><span class="nv">$VERSION_CODENAME</span><span class="k">}</span><span class="sh">
Components: stable
Signed-By: /etc/apt/keyrings/docker.asc
</span><span class="no">EOF
</span></code></pre></div></div>

<p>And install:</p>

<div class="language-bash highlighter-rouge"><div class="highlight"><pre class="highlight"><code><span class="nb">sudo </span>apt update
<span class="nb">sudo </span>apt <span class="nb">install</span> <span class="nt">-y</span> docker-ce docker-ce-cli containerd.io docker-buildx-plugin docker-compose-plugin
</code></pre></div></div>

<p>I verified everything was working with the standard hello-world test:</p>

<div class="language-bash highlighter-rouge"><div class="highlight"><pre class="highlight"><code><span class="nb">sudo </span>docker run hello-world
</code></pre></div></div>

<p>Got the expected “Hello from Docker!” message, so it was time to actually deploy Fleet.</p>

<h3 id="deploying-fleet-with-docker-compose">Deploying Fleet with Docker Compose</h3>

<p>Fleet publishes an official Docker Compose file and a sample environment file, so I made a directory for the deployment and pulled both down:</p>

<div class="language-bash highlighter-rouge"><div class="highlight"><pre class="highlight"><code><span class="nb">sudo mkdir</span> <span class="nt">-p</span> /opt/fleet-deployment
<span class="nb">cd</span> /opt/fleet-deployment

<span class="nb">sudo </span>curl <span class="nt">-O</span> https://raw.githubusercontent.com/fleetdm/fleet/refs/heads/main/docs/solutions/docker-compose/docker-compose.yml
<span class="nb">sudo </span>curl <span class="nt">-O</span> https://raw.githubusercontent.com/fleetdm/fleet/refs/heads/main/docs/solutions/docker-compose/env.example

<span class="nb">sudo cp </span>env.example .env
</code></pre></div></div>

<p>The <code class="language-plaintext highlighter-rouge">.env</code> file needs a few values filled in before Fleet will actually come up: a MySQL root password, a password for Fleet’s database user, and a private key Fleet uses internally. I generated all three with <code class="language-plaintext highlighter-rouge">openssl</code> rather than typing something out by hand:</p>

<div class="language-bash highlighter-rouge"><div class="highlight"><pre class="highlight"><code>openssl rand <span class="nt">-base64</span> 24
openssl rand <span class="nt">-base64</span> 24
openssl rand <span class="nt">-base64</span> 32
</code></pre></div></div>

<p>Then dropped those into <code class="language-plaintext highlighter-rouge">.env</code> in place of <code class="language-plaintext highlighter-rouge">MYSQL_ROOT_PASSWORD</code>, <code class="language-plaintext highlighter-rouge">MYSQL_PASSWORD</code>, and <code class="language-plaintext highlighter-rouge">FLEET_SERVER_PRIVATE_KEY</code>.</p>

<h3 id="certificates">Certificates</h3>

<p>Fleet needs a TLS certificate, since clients talk to it over HTTPS on port 1337. For a home lab setup a self-signed cert is fine. The important part is getting the <code class="language-plaintext highlighter-rouge">subjectAltName</code> right, since modern TLS validation ignores the old <code class="language-plaintext highlighter-rouge">CN</code> field and only checks SANs.</p>

<div class="language-bash highlighter-rouge"><div class="highlight"><pre class="highlight"><code><span class="nb">sudo mkdir </span>certs

<span class="nb">sudo </span>openssl req <span class="nt">-x509</span> <span class="nt">-nodes</span> <span class="nt">-days</span> 365 <span class="nt">-newkey</span> rsa:2048 <span class="se">\</span>
  <span class="nt">-keyout</span> certs/fleet.key <span class="se">\</span>
  <span class="nt">-out</span> certs/fleet.crt <span class="se">\</span>
  <span class="nt">-subj</span> <span class="s2">"/CN=fleet.local"</span> <span class="se">\</span>
  <span class="nt">-addext</span> <span class="s2">"subjectAltName=DNS:localhost,DNS:fleet.local,DNS:fleet,IP:127.0.0.1,IP:10.0.0.90"</span>
</code></pre></div></div>

<p>The Fleet container runs as a non-root user internally, uid 100 and gid 101, so the cert and key need to be owned accordingly or the container won’t be able to read them:</p>

<div class="language-bash highlighter-rouge"><div class="highlight"><pre class="highlight"><code><span class="nb">sudo chown </span>100:101 certs/fleet.<span class="k">*</span>
</code></pre></div></div>

<h3 id="bringing-it-up">Bringing it up</h3>

<p>With the environment file and certs in place, starting Fleet was just:</p>

<div class="language-bash highlighter-rouge"><div class="highlight"><pre class="highlight"><code><span class="nb">sudo </span>docker compose up <span class="nt">-d</span>
</code></pre></div></div>

<p>Docker pulled the Fleet, MySQL, and Redis images and started all three containers. I checked status with:</p>

<div class="language-bash highlighter-rouge"><div class="highlight"><pre class="highlight"><code><span class="nb">sudo </span>docker compose ps
</code></pre></div></div>

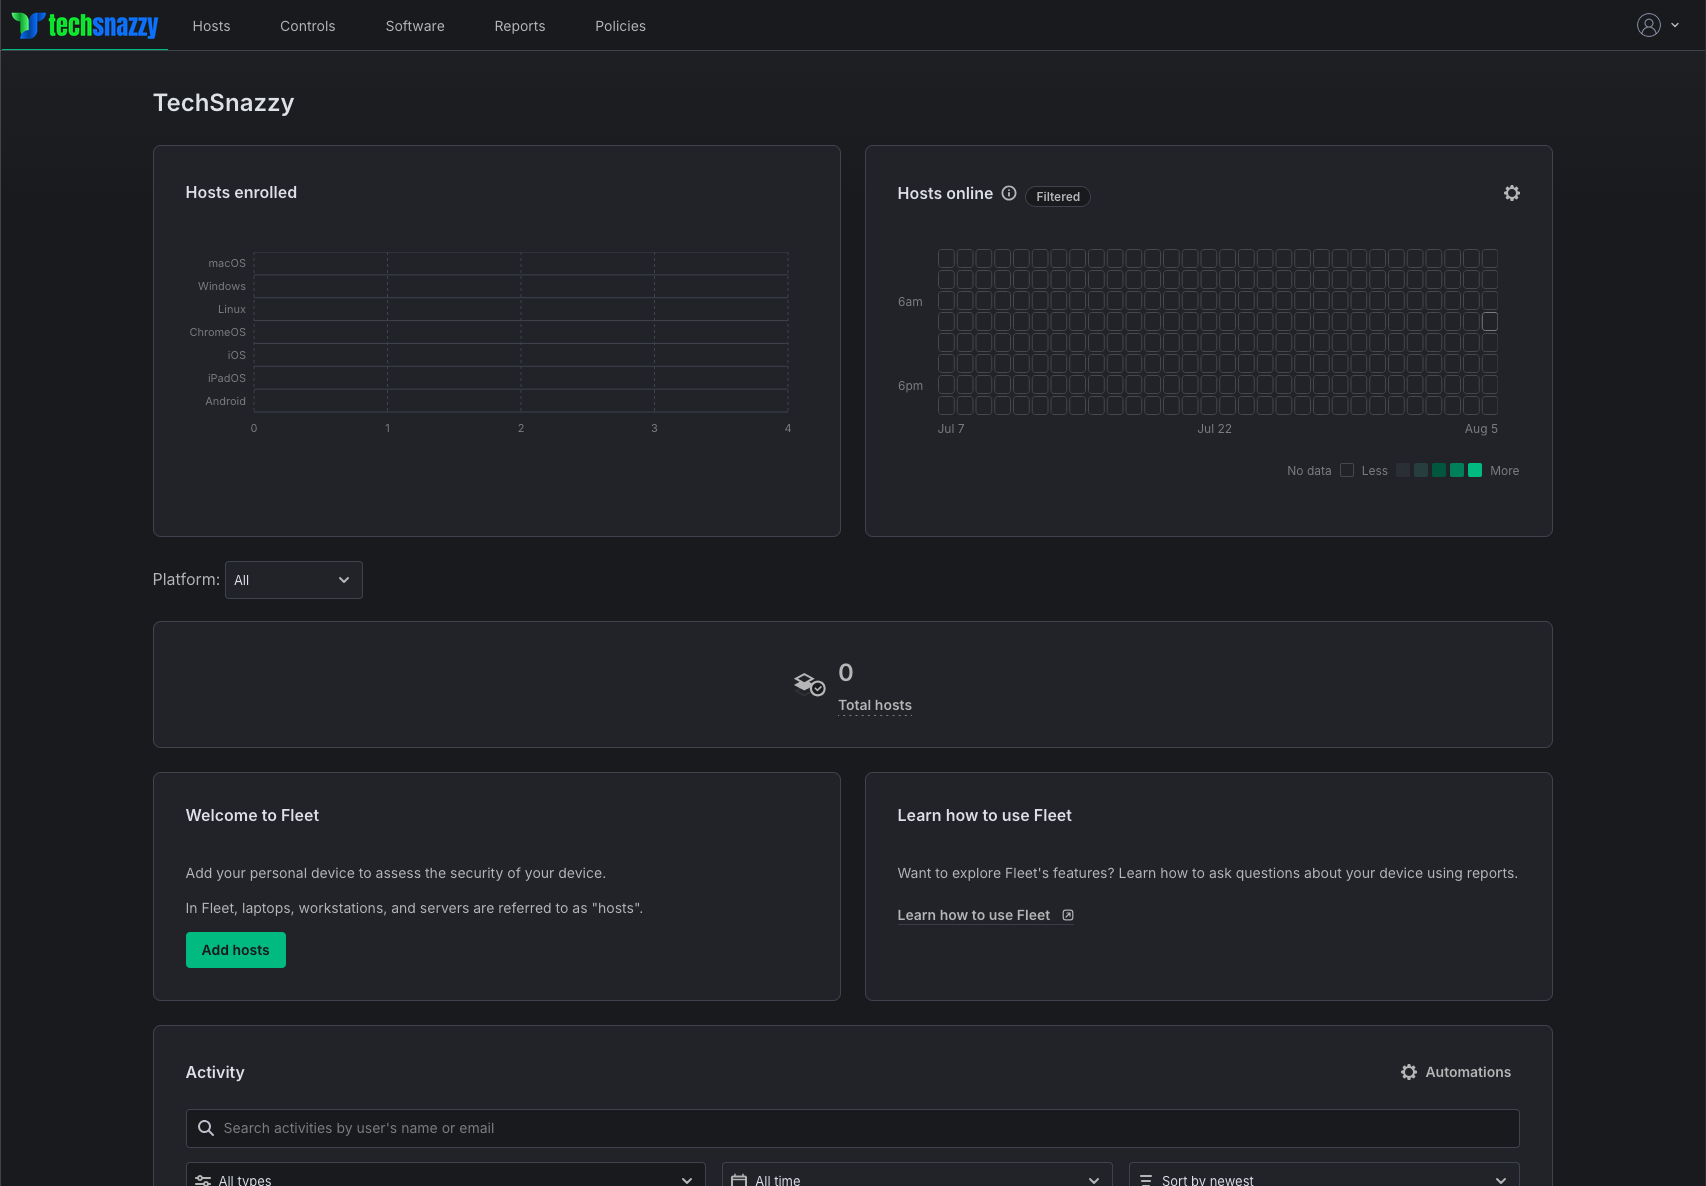
<p>Once MySQL and Redis showed healthy and the Fleet container passed its own health check, I hit <code class="language-plaintext highlighter-rouge">https://10.0.0.90:1337</code> in a browser. Since it’s a self-signed cert, the browser throws up a warning first, which is expected and fine to click through for a home network. That drops you into Fleet’s first-run setup wizard, where you create an admin account, name your organization, and set the Fleet server URL that clients will use.</p>

<p>I named my org TechSnazzy, which is the name I’ve used for my personal IT projects for years now.</p>

<p><img src="https://techsnazzy.github.io/sean-blog/assets/images/080526-fleet-dashboard.png" alt="Fleet dashboard after initial setup, showing zero hosts enrolled" /></p>

<p>Zero hosts enrolled, which is exactly where things should be at this point. Fleet is live, reachable, and waiting for devices.</p>

<h2 id="whats-next">What’s next</h2>

<p>Fleet is deployed and healthy on its own VM. The real work is still ahead of me: actually enrolling every device in the house into Fleet. Two MacBooks, a few iPads, a couple of iPhones, a Windows laptop, and a handful of other odds and ends. Each platform enrolls a little differently, so that’s going to be its own post, one that gets into the weeds on MDM profiles, osquery agent installs, and whatever headaches come up along the way.</p>]]></content><author><name>Sean Morrison</name></author><category term="Blog" /><category term="Technology" /><category term="Linux" /><category term="Proxmox" /><summary type="html"><![CDATA[I’ve been wanting to get real visibility into every device on my home network for a while now. Laptops, phones, tablets, all scattered around the house with no oversight unless something breaks. One day I just decided I wanted to self host a proper MDM instead of continuing to live without one, and FleetDM was the tool I kept coming back to.]]></summary></entry><entry><title type="html">Wrapping Up My Ross Project</title><link href="https://techsnazzy.github.io/sean-blog/blog/career/microsoft%20365/intune/2026/05/20/wrapping-up-my-ross-project.html" rel="alternate" type="text/html" title="Wrapping Up My Ross Project" /><published>2026-05-20T17:00:00+00:00</published><updated>2026-05-20T17:00:00+00:00</updated><id>https://techsnazzy.github.io/sean-blog/blog/career/microsoft%20365/intune/2026/05/20/wrapping-up-my-ross-project</id><content type="html" xml:base="https://techsnazzy.github.io/sean-blog/blog/career/microsoft%20365/intune/2026/05/20/wrapping-up-my-ross-project.html"><![CDATA[<p><img src="https://techsnazzy.github.io/sean-blog/assets/images/ross-project-wrap-up.jpg" alt="Wrapping up my Ross project" /></p>

<p>Have you ever landed an opportunity that felt like everything you’d been working toward finally lined up?</p>

<p>I just wrapped up a contract I’m really proud of. It was a rare opportunity, and I’m grateful to have been part of getting things off the ground.</p>

<p>The team at Averro first contacted me and then E360 took a chance on me, and I was brought in as an IT Engineer to help a large, well-known retailer build out a modern device enrollment system from scratch. It was a greenfield project, the kind of work that sets the foundation for how employees will eventually get their hands on a device and get to work.</p>

<p>The technical side was challenging and rewarding, and I threw everything I had at it. Every bit of experience I’ve accumulated over the years rolled into one project. The result wasn’t fully finished (is it ever?), but it was something I’m proud of. And as meaningful as the work was, what I’ll remember most is the people. The level of talent and professionalism I encountered is something I won’t forget.</p>

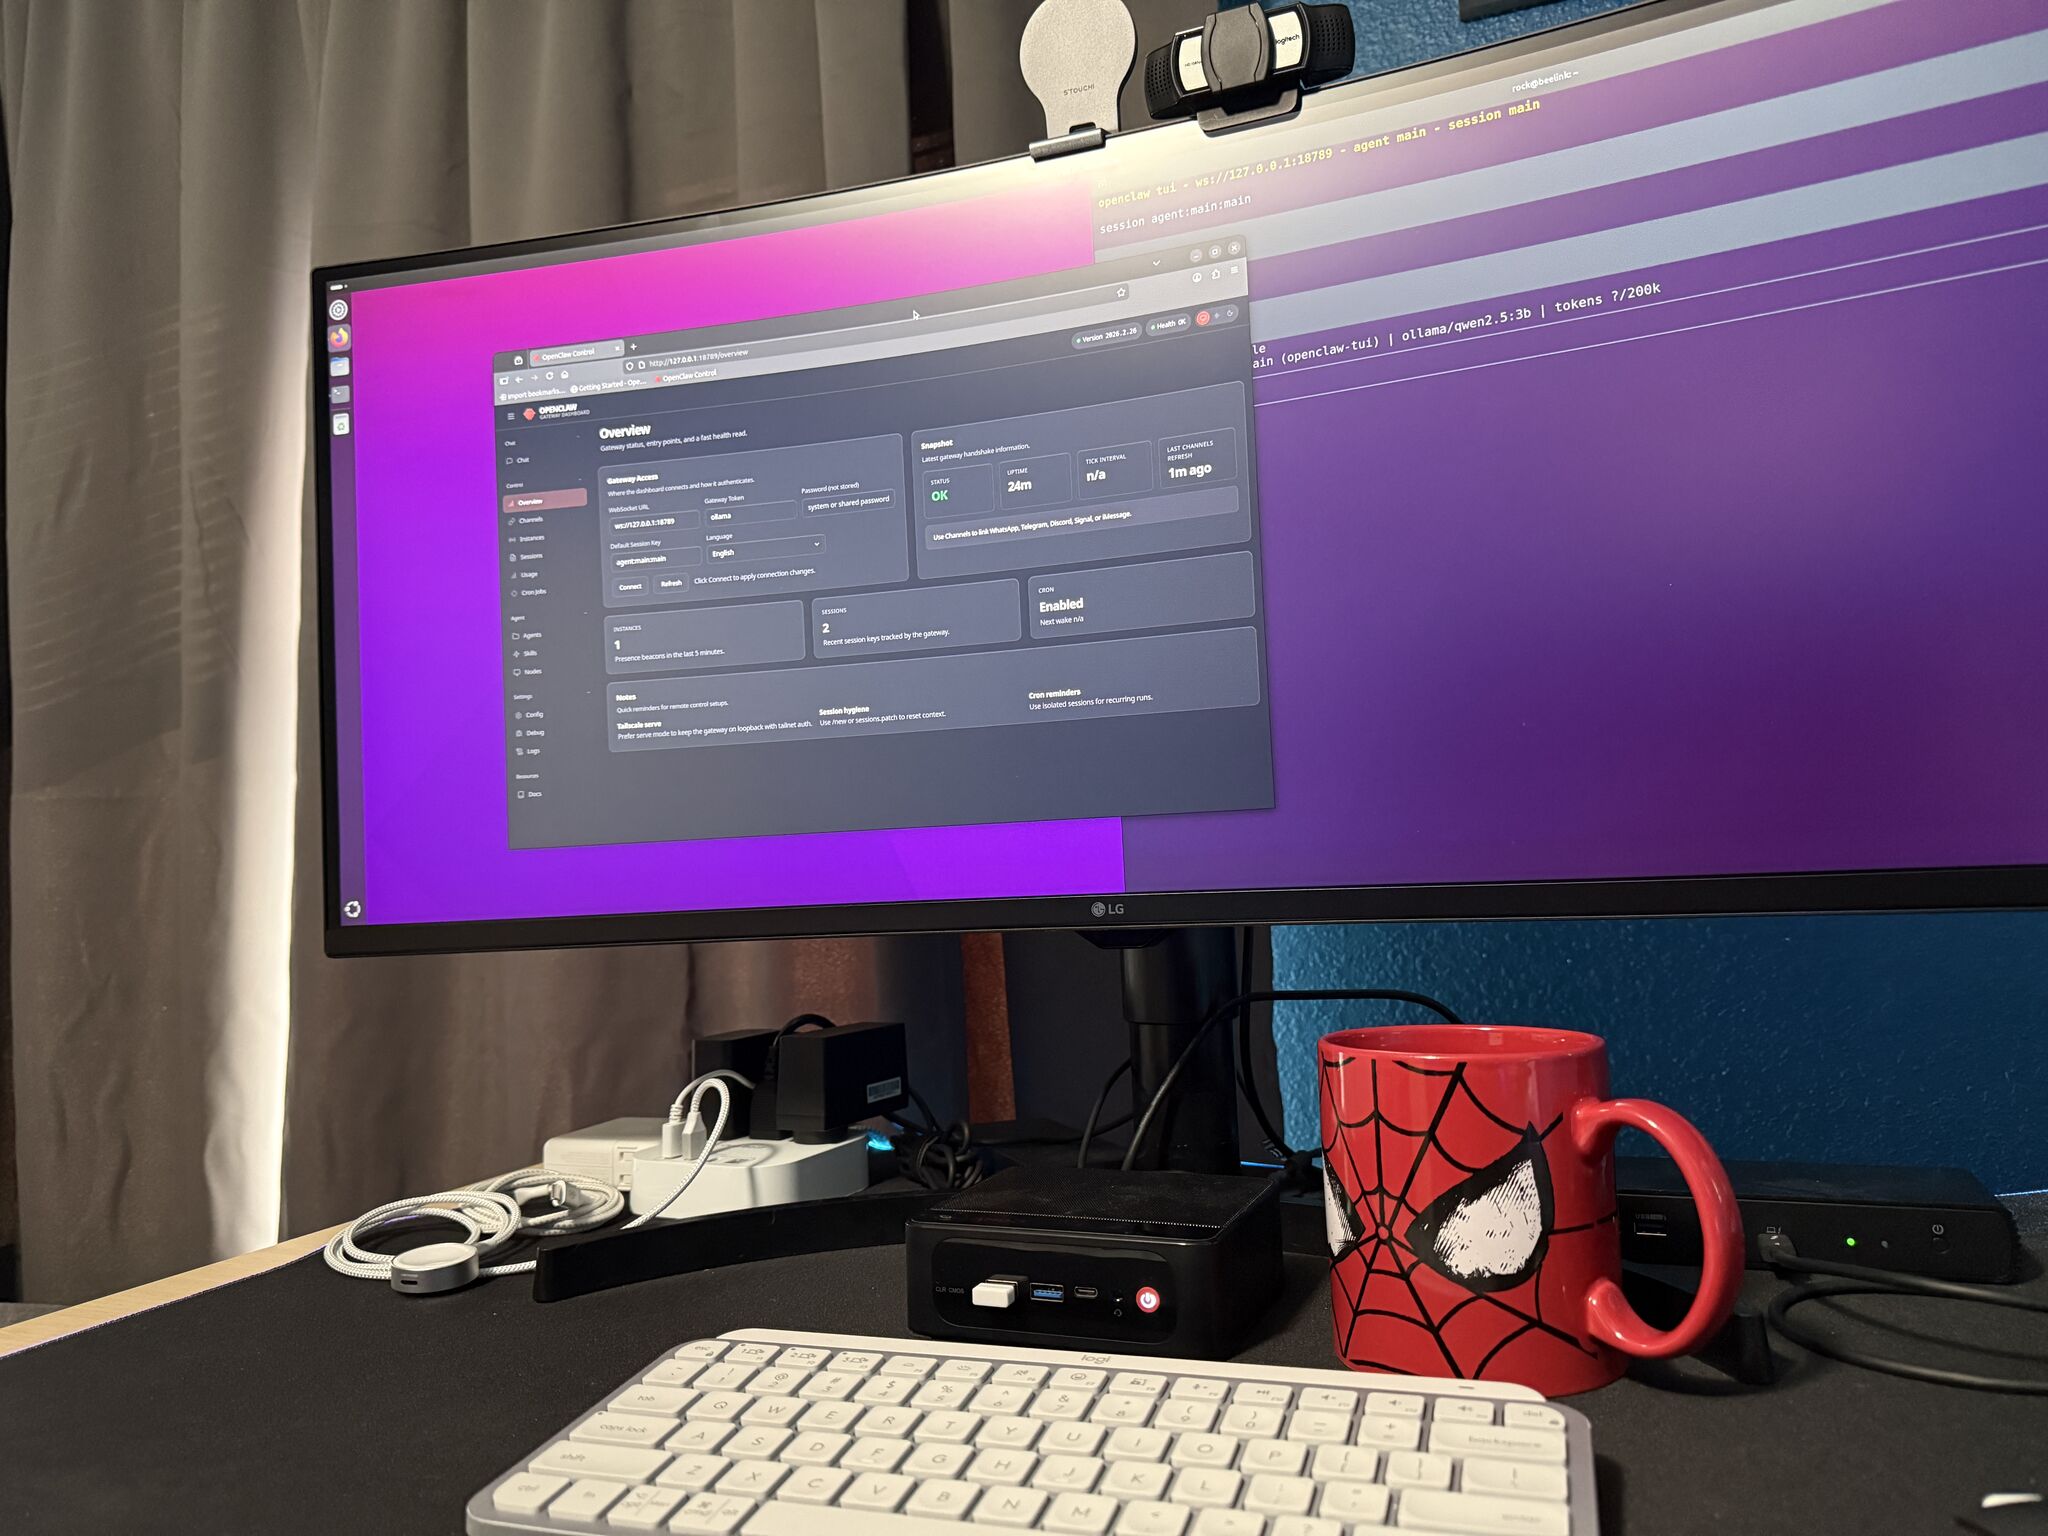
<p>I’m grateful for this one, and excited to see where this kind of work takes me next.</p>]]></content><author><name>Sean Morrison</name></author><category term="Blog" /><category term="Career" /><category term="Microsoft 365" /><category term="Intune" /><summary type="html"><![CDATA[]]></summary></entry><entry><title type="html">Running OpenClaw as a Local AI Agent</title><link href="https://techsnazzy.github.io/sean-blog/blog/technology/ai/homelab/2026/03/23/running-openclaw-as-a-local-ai-agent.html" rel="alternate" type="text/html" title="Running OpenClaw as a Local AI Agent" /><published>2026-03-23T17:00:00+00:00</published><updated>2026-03-23T17:00:00+00:00</updated><id>https://techsnazzy.github.io/sean-blog/blog/technology/ai/homelab/2026/03/23/running-openclaw-as-a-local-ai-agent</id><content type="html" xml:base="https://techsnazzy.github.io/sean-blog/blog/technology/ai/homelab/2026/03/23/running-openclaw-as-a-local-ai-agent.html"><![CDATA[<p><img src="https://techsnazzy.github.io/sean-blog/assets/images/openclaw-local-ai.jpg" alt="Running OpenClaw as a local AI agent" /></p>

<p>For the past few weeks I’ve been experimenting with running my own local AI agent instead of relying on cloud APIs. This week I finally got OpenClaw working on a small Beelink mini PC, and it feels like an important milestone.</p>

<p>The system is running Ubuntu LTS 24.04, fully updated, and isolated on its own wireless guest network completely separate from my primary LAN. I hardened it further by binding services to localhost, restricting network exposure, limiting filesystem access to a controlled workspace, and running the agent inside a sandboxed container. The goal is simple: strong isolation, minimal attack surface, and full local control.</p>

<p>What makes this setup different is that it’s not using OpenAI, Anthropic, or Gemini APIs. It’s running entirely local using Ollama with the qwen2.5:3b model. This is a relatively small model, so it’s not as capable as larger cloud-hosted models accessed via API tokens. But it’s completely free to experiment with, which was the primary goal. For business or enterprise use, you could run larger models on more capable hardware or integrate API access to significantly increase capability.</p>

<p>Right now I can send it a DM in Discord and it responds directly from my own hardware. More importantly, there’s a key difference between a normal chat interface and an agent platform like OpenClaw. A typical LLM chat responds only when you manually ask it something. OpenClaw provides a framework where the model can be connected to tools, inputs, and conditions, enabling automation and workflows beyond simple questions and answers.</p>

<p>It took longer than expected to get everything working, mostly because my budget and resources are limited. I’m working with a small Beelink mini PC and essentially zero budget. If I had enterprise hardware or significant funding behind it, the setup and capabilities would be very different. But part of the value here is proving what’s possible with minimal resources and fully open tooling.</p>

<p>Now that it’s up and running, the focus shifts to exploring what it can actually do and whether there is practical value in running an isolated, local AI agent like this.</p>]]></content><author><name>Sean Morrison</name></author><category term="Blog" /><category term="Technology" /><category term="AI" /><category term="Homelab" /><summary type="html"><![CDATA[]]></summary></entry><entry><title type="html">Switching to Linux</title><link href="https://techsnazzy.github.io/sean-blog/blog/technology/linux/2026/02/23/switching-to-linux.html" rel="alternate" type="text/html" title="Switching to Linux" /><published>2026-02-23T17:00:00+00:00</published><updated>2026-02-23T17:00:00+00:00</updated><id>https://techsnazzy.github.io/sean-blog/blog/technology/linux/2026/02/23/switching-to-linux</id><content type="html" xml:base="https://techsnazzy.github.io/sean-blog/blog/technology/linux/2026/02/23/switching-to-linux.html"><![CDATA[<p><img src="https://techsnazzy.github.io/sean-blog/assets/images/switching-to-linux.jpg" alt="Switching to Linux" /></p>

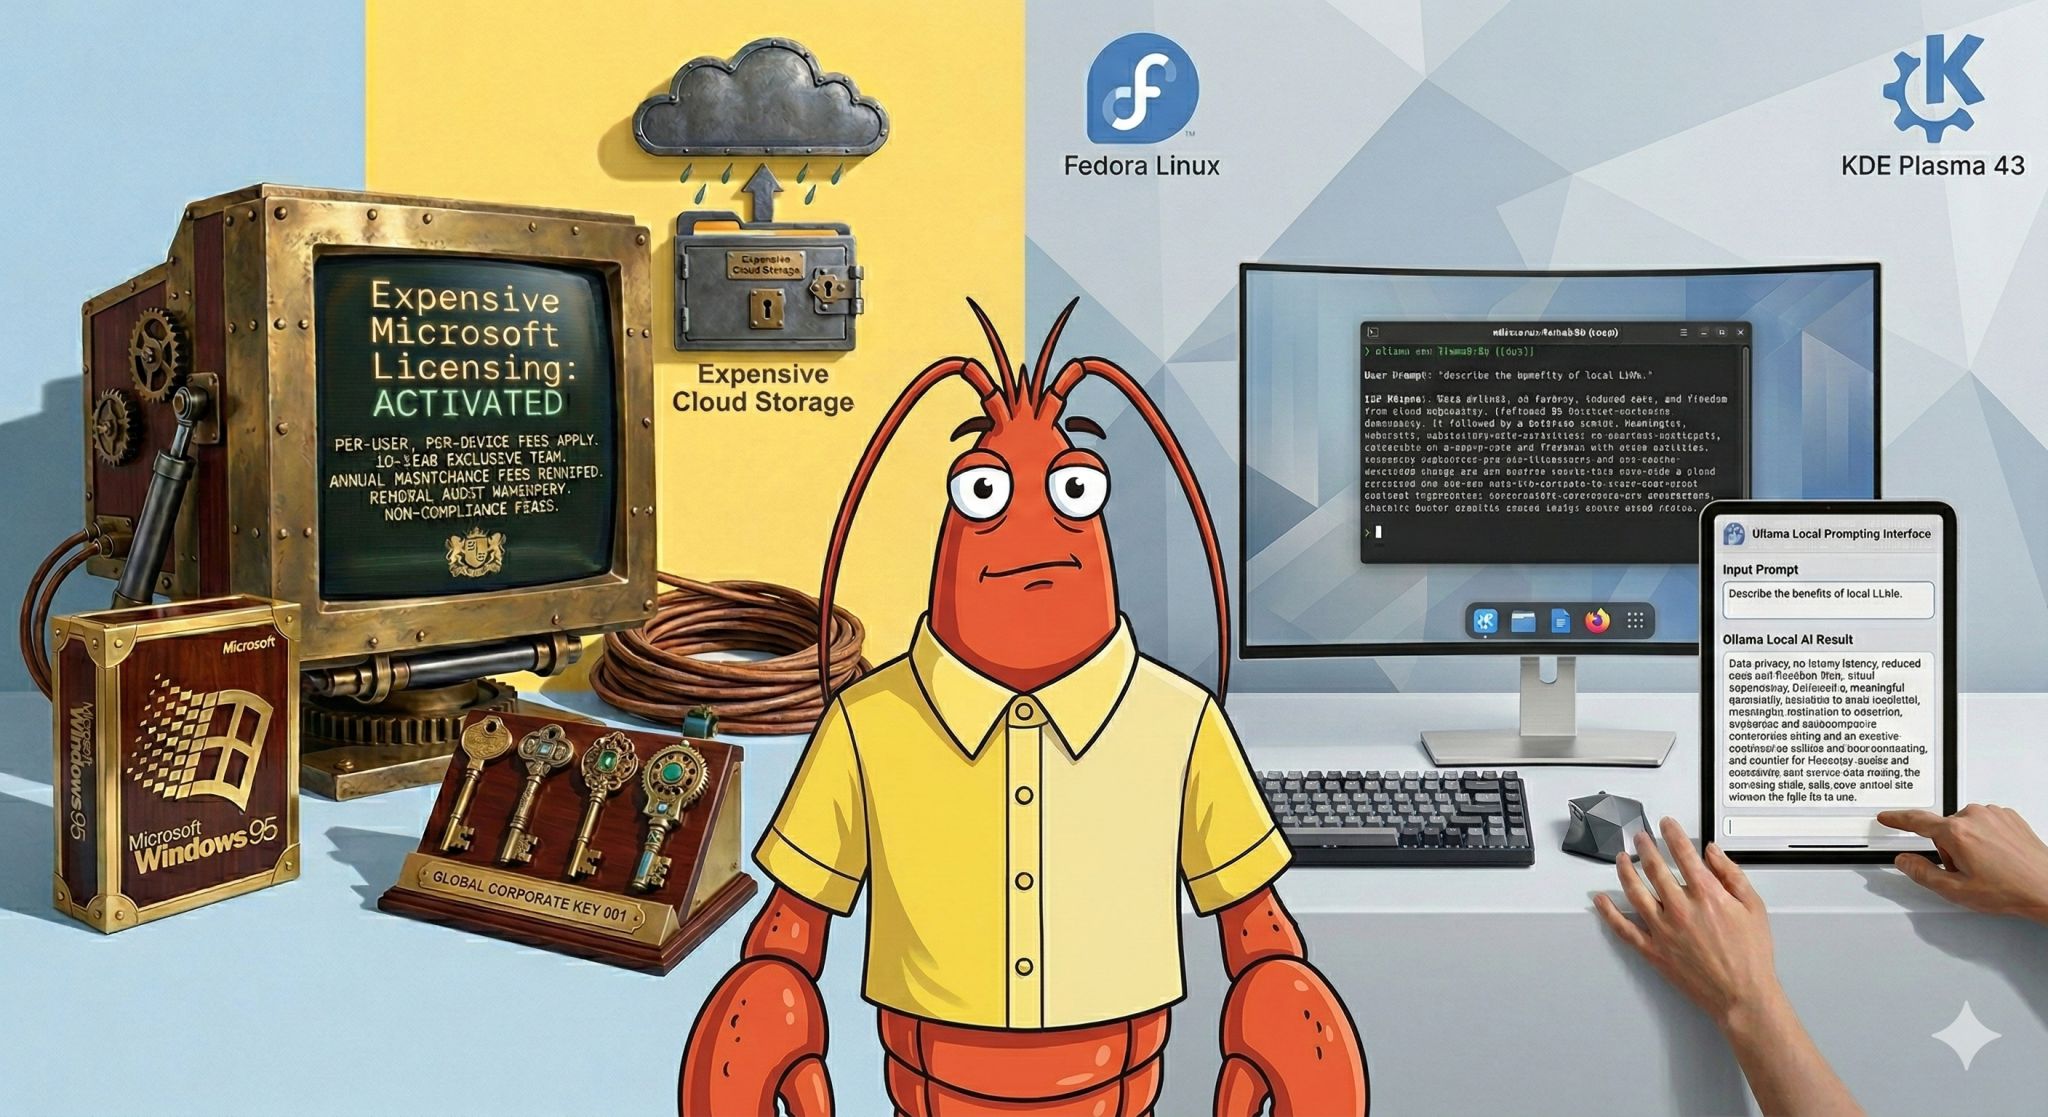
<p>Have you ever thought about switching to Linux?</p>

<p>I started with Windows 3.11 in the early 1990s and have used every major version since, including Windows 11 most recently. Along the way I also became proficient with macOS, UNIX, and Linux. But my introduction to Linux was not as a hobby. It came from necessity.</p>

<p>In 2005, while working at a small MEMS engineering startup focused on ASIC design, I helped deploy and support a network of Red Hat Enterprise Linux workstations used by engineers for chip design and simulation. These systems ran specialized electronic design automation (EDA) tools designed primarily for Linux and UNIX environments. Stability and uptime were critical, and this was my first exposure to Linux as a true production operating system.</p>

<p>A couple years later, while studying for my Solaris certification, I received a free copy of Ubuntu. That opened the door to using Linux more broadly in home labs and personal projects. Over time I used Fedora, Ubuntu, and even experimented with Arch. Still, Windows remained my primary operating system for decades, including Windows 11 on my main workstation.</p>

<p>Until this week.</p>

<p>I migrated my primary desktop system from Windows 11 to Fedora KDE Plasma 43. I moved my files out of OneDrive, disabled auto renew on Microsoft 365, and committed to Linux as my daily environment. I configured the NVIDIA drivers, migrated my workflows, and validated that everything I rely on works as expected.</p>

<p>Modern Linux is no longer limited to servers or niche use cases. It is a mature, stable, and highly capable operating system that can serve as a primary desktop platform for many technical users.</p>

<p>Cost was one of the biggest motivators. Modern computing has become increasingly subscription driven, with recurring licensing fees for productivity tools, cloud storage, and hosted services. By switching to Linux, using free and open source software, and relying on local infrastructure such as my own NAS for storage and backups, I significantly reduced my ongoing software expenses.</p>

<p>Equally important is control and flexibility. Linux allows me to choose when and how systems are updated, which software is installed, and where my data is stored. It aligns closely with the same platform that powers cloud infrastructure, development environments, and most modern computing systems.</p>

<p>By combining Linux, free and open source software, local storage, and a small number of targeted subscriptions such as AI services, I now have the same core capabilities I had before, but with far lower ongoing cost and far greater control over my computing environment.</p>

<p>For the first time in over 30 years, my primary operating system is no longer Windows 11.</p>

<p>This time, it is Linux.</p>]]></content><author><name>Sean Morrison</name></author><category term="Blog" /><category term="Technology" /><category term="Linux" /><summary type="html"><![CDATA[]]></summary></entry><entry><title type="html">The Future of AI</title><link href="https://techsnazzy.github.io/sean-blog/blog/technology/ai/2026/02/03/the-future-of-ai.html" rel="alternate" type="text/html" title="The Future of AI" /><published>2026-02-03T17:00:00+00:00</published><updated>2026-02-03T17:00:00+00:00</updated><id>https://techsnazzy.github.io/sean-blog/blog/technology/ai/2026/02/03/the-future-of-ai</id><content type="html" xml:base="https://techsnazzy.github.io/sean-blog/blog/technology/ai/2026/02/03/the-future-of-ai.html"><![CDATA[<p><img src="https://techsnazzy.github.io/sean-blog/assets/images/future-of-ai.jpg" alt="The future of AI" /></p>

<p>What is the future of AI, and is it really coming for everyone’s job? I do not have a crystal ball, but one thing is clear. Things are evolving fast.</p>

<p>For the past few years, AI has largely worked in a simple pattern. You write a prompt, and it returns a result. It has already become extremely effective at helping write Python, PowerShell, and other kinds of code, generate applications, and accelerate development. Tools like Codex (whether by macOS app, CLI, or VS Code extension), Claude Code, and other AI-assisted development environments have made it possible for almost anyone to build software and automate workflows.</p>

<p>But a major shift is now underway.</p>

<p>Emerging agent-based AI projects demonstrate a new model. Instead of simply responding to prompts, AI systems can now be configured to follow rules, make conditional decisions, and execute multi-step tasks. This changes the model from passive tool to active assistant, capable of operating with defined goals and behaviors.</p>

<p>Competition is accelerating rapidly. OpenAI, Anthropic, and others are expanding AI capabilities across desktop, mobile, and development environments. The direction is clear. AI is moving beyond isolated prompts toward persistent systems that assist continuously and integrate directly into daily workflows.</p>

<p>We have seen this pattern before. The “cloud” was once viewed primarily as a new way to deliver storage and compute over the internet. Today it represents the backbone of global computing infrastructure. Massive datacenters power everything from enterprise workloads to personal storage. Companies like NVIDIA have seen explosive growth in their data center business, reflecting the massive demand for AI infrastructure worldwide.</p>

<p>But the next phase may also become more personal.</p>

<p>As hardware continues to advance, local machines are becoming increasingly capable of running sophisticated AI workloads. This raises an interesting possibility. What happens when every individual has their own personal AI system running locally? A system capable of assisting, automating, and coordinating tasks on their behalf.</p>

<p>A computer on every desk was once the goal. Now it may be an intelligent assistant on every desk.</p>

<p>This raises important questions. Not just about jobs, but about how work itself evolves. The people who understand these systems, guide them, and integrate them effectively will be in a strong position moving forward.</p>

<p>These are simply observations from someone working in IT, watching the transition unfold in real time, and preparing for what comes next.</p>]]></content><author><name>Sean Morrison</name></author><category term="Blog" /><category term="Technology" /><category term="AI" /><summary type="html"><![CDATA[]]></summary></entry><entry><title type="html">Autopilot and Intune Endpoint Deployment</title><link href="https://techsnazzy.github.io/sean-blog/blog/technology/microsoft%20365/intune/2026/01/23/autopilot-and-intune-endpoint-deployment.html" rel="alternate" type="text/html" title="Autopilot and Intune Endpoint Deployment" /><published>2026-01-23T17:00:00+00:00</published><updated>2026-01-23T17:00:00+00:00</updated><id>https://techsnazzy.github.io/sean-blog/blog/technology/microsoft%20365/intune/2026/01/23/autopilot-and-intune-endpoint-deployment</id><content type="html" xml:base="https://techsnazzy.github.io/sean-blog/blog/technology/microsoft%20365/intune/2026/01/23/autopilot-and-intune-endpoint-deployment.html"><![CDATA[<p><img src="https://techsnazzy.github.io/sean-blog/assets/images/autopilot-intune-endpoint-deployment.jpg" alt="Autopilot and Intune endpoint deployment" /></p>

<p>How long do you spend setting up and deploying new laptops?</p>

<p>Do you buy them ready to hand over, build them manually, or still image them with Acronis?</p>

<p>Endpoint deployment is one of those areas I kept coming back to, because when it’s good, IT runs smoother, and when it’s messy, everything else gets harder.</p>

<p>In a previous long-term role, our early deployment method was the classic approach with Acronis imaging. It was fast and it worked, but the problem was always the same. The image starts aging the moment you capture it. Windows updates, drivers, apps, and security baselines all drift. Before long, you’re spending more time maintaining the image than benefiting from it.</p>

<p>So I took the next step and built a more structured workflow using MDT server automation. That brought real improvements: better standardization, more control over drivers and installs, and a repeatable process that didn’t rely on undocumented steps or guesswork.</p>

<p>But the real end game was always modern management.</p>

<p>Eventually, I shifted toward Windows Autopilot and Microsoft Intune, with the goal of getting every endpoint cloud-managed. The challenge was that we weren’t starting from a clean slate. We still had on-prem Active Directory, a growing fleet of devices, and a lot of real-world constraints across multiple locations.</p>

<p>That’s where the work got interesting.</p>

<p>I stitched together a practical solution using PowerShell automation, deployment profiles, configuration policies, and app deployments to support both onboarding new devices through Autopilot, and repurposing existing devices into a modern enrollment flow.</p>

<p>Along the way, I also laid a foundation for security with Microsoft Defender for Endpoint, plus some basic Purview sensitivity labeling and DLP to start reducing risk without blocking productivity.</p>

<p>Was it perfect? No. Hybrid environments rarely are.</p>

<p>There were times devices became stale, duplicate entries appeared across Entra ID, Autopilot, and Intune, and some workflows still required manual steps like collecting hardware hashes or triggering enrollment from Windows settings. But even with a few rough edges, it made a real difference, especially when onboarding volume increased and the business needed consistency at scale.</p>

<p>Looking back, I never got the chance to fully finish and polish what I started in that previous environment. There was always another onboarding wave, another priority, and another fire to put out.</p>

<p>What’s been really rewarding lately is revisiting all of that work in my own TechSnazzy tenant, my lab environment, with the time to iron out the bugs and do it the way I always wanted to. Cleaner design, fewer manual touch points, and a foundation that’s fully repeatable.</p>

<p>It’s only a handful of devices, but seeing a modern endpoint lifecycle running smoothly end-to-end, with no guesswork, reminds me why I enjoy this so much.</p>]]></content><author><name>Sean Morrison</name></author><category term="Blog" /><category term="Technology" /><category term="Microsoft 365" /><category term="Intune" /><summary type="html"><![CDATA[]]></summary></entry><entry><title type="html">A Warning About LinkedIn Phishing</title><link href="https://techsnazzy.github.io/sean-blog/blog/career/security/2026/01/15/a-warning-about-linkedin-phishing.html" rel="alternate" type="text/html" title="A Warning About LinkedIn Phishing" /><published>2026-01-15T17:00:00+00:00</published><updated>2026-01-15T17:00:00+00:00</updated><id>https://techsnazzy.github.io/sean-blog/blog/career/security/2026/01/15/a-warning-about-linkedin-phishing</id><content type="html" xml:base="https://techsnazzy.github.io/sean-blog/blog/career/security/2026/01/15/a-warning-about-linkedin-phishing.html"><![CDATA[<p><img src="https://techsnazzy.github.io/sean-blog/assets/images/linkedin-phishing-warning.jpg" alt="LinkedIn phishing warning" /></p>

<p>Have you ever received a message from a recruiter where something just did not feel quite right?</p>

<p>Over the past few months, I have spent more time than usual on LinkedIn, and I know I am not alone.</p>

<p>Last July, my role at Standard Fiber came to an end after a long stretch there. Not long after, I joined FIT Solutions. It is a great company with good people, and I am genuinely glad I had the opportunity. In the end, it just was not the right long term fit for me.</p>

<p>Then the holidays arrived. Hiring slowed down, conversations paused, and now here we are at the start of a new year. So after all of that, and like many others, I find myself back here on LinkedIn figuring out my next steps.</p>

<p>As I have been connecting with people, I have noticed a pattern that is worth looking at.</p>

<p>Some messages come from profiles that look like recruiters or hiring contacts, but the interaction quickly shifts to asking for a resume or personal details without much context. Sometimes nothing is obviously wrong, but something feels off.</p>

<p>In many cases, this is a form of phishing.</p>

<p>The idea behind phishing is not always to steal something immediately. Often the goal is to gather information that can be used later. A resume can include your full name, contact details, work history, locations, and the tools or systems you have worked with. That is a lot of personal information to hand over too quickly.</p>

<p>If you are actively job hunting, here are a few things that have helped me slow down and think things through.</p>

<p>First, take a moment to look at the profile reaching out. Do they have a clear work history and a real company listed? Do their connections and activity seem consistent?</p>

<p>Second, notice how quickly they ask for your resume. Many legitimate recruiters are happy to have a short conversation first and explain the role before requesting documents.</p>

<p>Third, check the company outside of LinkedIn. A quick search can often confirm whether a role or organization is real.</p>

<p>Fourth, pay attention to where they ask you to send your resume. If someone claims to represent a company but asks you to email your resume to a generic address like hr-company@outlook.com or hr-company@gmail.com, that is usually a red flag. Legitimate companies almost always use their own domain for hiring communications.</p>

<p>Fifth, share less early on and trust your instincts. A brief summary of your background is usually enough until trust is established. If something feels rushed, vague, or uncomfortable, it is okay to pause or move on.</p>

<p>Most people on LinkedIn are there for the right reasons, and it is still a valuable place to network and find opportunities. This is just a reminder to move carefully, especially during times of transition when we are more open and more exposed.</p>

<p>If you are job searching right now, you are not alone.</p>]]></content><author><name>Sean Morrison</name></author><category term="Blog" /><category term="Career" /><category term="Security" /><summary type="html"><![CDATA[]]></summary></entry><entry><title type="html">Rebuilding My Homelab with KVM and Proxmox</title><link href="https://techsnazzy.github.io/sean-blog/blog/technology/homelab/proxmox/2025/12/23/rebuilding-my-homelab-with-kvm-and-proxmox.html" rel="alternate" type="text/html" title="Rebuilding My Homelab with KVM and Proxmox" /><published>2025-12-23T17:00:00+00:00</published><updated>2025-12-23T17:00:00+00:00</updated><id>https://techsnazzy.github.io/sean-blog/blog/technology/homelab/proxmox/2025/12/23/rebuilding-my-homelab-with-kvm-and-proxmox</id><content type="html" xml:base="https://techsnazzy.github.io/sean-blog/blog/technology/homelab/proxmox/2025/12/23/rebuilding-my-homelab-with-kvm-and-proxmox.html"><![CDATA[<p><img src="https://techsnazzy.github.io/sean-blog/assets/images/kvm-proxmox-lab-rebuild.jpg" alt="Homelab rebuild" /></p>

<p>Following up on my last blog post, I’m currently working through the MS-102 (Microsoft 365 Administrator) course, which is very cloud focused. Most of the material revolves around Microsoft 365 services, Entra ID, Intune, security, and compliance. Even so, I wanted a realistic lab environment to practice with, not just clicking through portals, but understanding how things fit together end to end.</p>

<p>That decision sent me down a bit of a rabbit hole.</p>

<p>After a lot of trial, error, and rethinking, I landed on a setup that I’m happy with. My old Intel NUC now runs Proxmox on bare metal as a Type 1 hypervisor, hosting two Linux servers for my password manager and Git repositories. Nothing flashy, just stable services I rely on.</p>

<p>For Active Directory, things took a different turn. I originally tried hosting Windows Server 2019 Standard on Windows 11 Pro using Hyper-V, but it was too bloated for the small Bee-Link mini PC I’m using. Performance was poor, it froze a lot, and it felt like I was spending too much time dealing with issues, so I scrapped it.</p>

<p>The new setup uses Fedora Workstation as the host OS with KVM/QEMU running the Windows Server 2019 domain controller VM. While this is technically a Type 2 hypervisor setup, KVM is a kernel level hypervisor, so in practice it behaves much closer to Type 1. Performance is excellent, stability is night and day better, and I can RDP into both the Fedora host and the DC with no extra remote access tools. Win win win.</p>

<p>Is this strictly necessary for MS-102? Probably not. But building out a working environment, even when it isn’t directly required, helps reinforce the bigger picture. In a production environment I would do deeper comparisons and planning, but for a home lab and learning setup, this has been a great experience.</p>

<p>The best part is that the only cost was the Windows Server license (which I got on eBay for cheap). Everything else is free, open source, and runs well on older or lower performance hardware. It took some configuration to get here, but it’s now documented and repeatable.</p>

<p>Back to MS-102, with a healthy dose of job searching sprinkled in between.</p>]]></content><author><name>Sean Morrison</name></author><category term="Blog" /><category term="Technology" /><category term="Homelab" /><category term="Proxmox" /><summary type="html"><![CDATA[]]></summary></entry></feed>